The UK offers some of the most beautiful and varied hiking terrain in the world, from the rolling hills of the Peak District to the rugged mountains of Scotland and Wales. However, this beauty can be deceptive. Weather conditions can change rapidly, paths can be poorly marked, and relying solely on technology isn’t always sufficient. In 2026, while digital mapping continues to evolve, the fundamental skill of map reading remains crucial for safe and enjoyable hiking. Ordnance Survey (OS) has recently updated its digital mapping platform with enhanced 3D visualisation, but these remain power-dependent, and don’t replace the resilience of a paper map and compass. This guide will equip you with the basic skills to navigate confidently using traditional methods.
As an Amazon Associate, we earn from qualifying purchases. This means we may receive a small commission at no extra cost to you when you buy through links on this page.
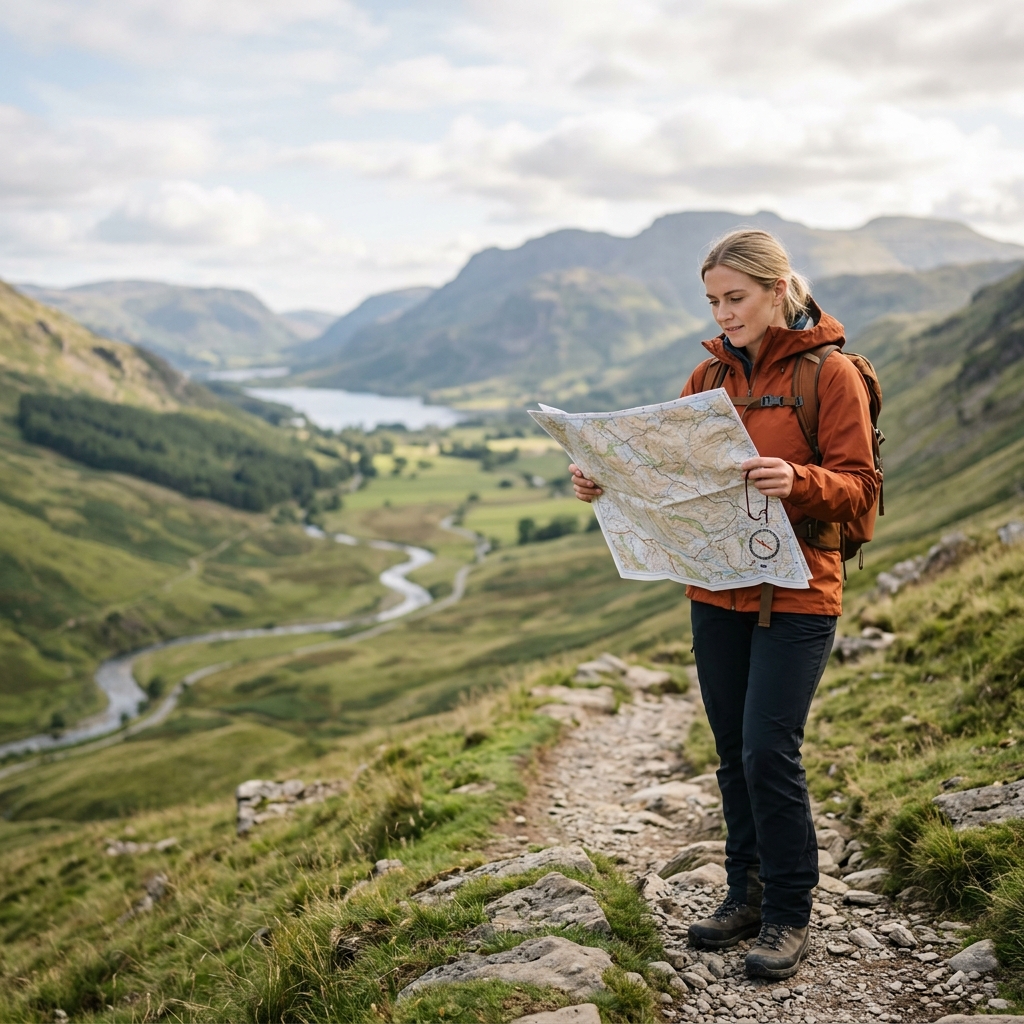
Table of Contents
Understanding Ordnance Survey (OS) Maps: The UK Standard
Ordnance Survey maps are the definitive maps for hiking in the UK. They are renowned for their accuracy and detail. They utilise a specific set of symbols, colours and scales to represent the landscape. The two most common map scales for hikers are:
- 1:25,000 (Explorer Maps): These maps cover a smaller area in greater detail. They are ideal for detailed route planning and navigating in complex terrain. A single Explorer map typically costs around £8.99 – £10.99.
- 1:50,000 (Landranger Maps): These maps cover a larger area with less detail. They are better suited for overview planning and longer-distance hikes. Landranger maps usually cost between £6.99 – £8.99.
Digital OS Maps: OS Maps online and via their mobile app provide a convenient alternative, offering interactive features and GPS integration. However, remember that these rely on battery life and signal strength, which can be unreliable in remote areas. They are best used *in conjunction* with a physical map and compass, not as a replacement.
Comparing Explorer and Landranger Maps
| Feature | Explorer (1:25,000) | Landranger (1:50,000) |
|---|---|---|
| Scale | 1:25,000 (4 inches to 1 mile) | 1:50,000 (2 inches to 1 mile) |
| Detail | High – Shows individual trees, buildings, and small paths. | Moderate – Shows main features and larger paths. |
| Area Covered | Smaller | Larger |
| Best For | Detailed route planning, complex terrain. | Overview planning, long-distance hikes. |
| Typical Price (2026) | £8.99 – £10.99 | £6.99 – £8.99 |
Key Map Features: Contours, Terrain, and Landmarks
Understanding how to read contours is fundamental to map reading. Contour lines connect points of equal elevation. The closer the lines, the steeper the slope. Widely spaced lines indicate a gentle slope. A ‘V’ shape in contour lines points uphill; the closed end of the ‘V’ indicates the summit or highest point.
Terrain features to identify include:
- Hills & Mountains: Represented by concentric contour lines.
- Valleys: The ‘V’ shapes mentioned above, often with a river or stream flowing through them.
- Rivers & Streams: Blue lines, indicating watercourses.
- Forests: Green areas, often with tree symbols.
Spot heights are precise elevation points marked on the map. Triangulation points (triangles) are used for accurate map positioning, particularly when combined with a compass.
Introduction to Compass Navigation
A compass is an essential tool for navigation. It works by aligning with the Earth’s magnetic field. Most hiking compasses have the following parts:
- Baseplate: The clear plastic base.
- Rotating Bezel: The dial marked with degrees (0-360).
- Magnetic Needle: The red end points towards magnetic north.
- Orienting Arrow: A fixed arrow within the bezel.
- Direction of Travel Arrow: An arrow on the baseplate indicating the direction to walk.
Magnetic Declination: This is the angle between true north (geographic north) and magnetic north. In the UK, declination varies depending on your location. As of 2026, the declination is approximately 1° West, meaning magnetic north is 1° west of true north. You must adjust your bearings to account for this. Always check the current declination for your area on the OS map itself, as it is printed on the map legend.
Local Attraction: Metal objects can interfere with a compass reading. Be aware of nearby fences, power lines, and even metal buckles on your clothing or backpack.
Popular Compass Choices (2026)
| Compass | Price (Approx.) | Pros | Cons |
|---|---|---|---|
| Silva Ranger | £35 – £45 | Durable, clear baseplate, good for beginners. | Can be bulky. |
| Suunto MC-2 | £40 – £50 | Global needle (works in all hemispheres), accurate, reliable. | Slightly more complex to use initially. |
Combining Map and Compass: Practical Techniques
Taking a Map Bearing: Place the edge of the compass baseplate on the map, connecting your starting point to your destination. Rotate the bezel until the orienting arrow aligns with north on the map. Read the bearing in degrees at the direction of travel arrow.
Following a Bearing: Hold the compass flat and rotate your body until the red end of the magnetic needle aligns with the orienting arrow. The direction of travel arrow now points towards your destination. Follow that direction, keeping the needle aligned.
Relocating Yourself: If lost, try to identify at least two prominent landmarks on the map. Take bearings to these landmarks and draw lines on the map representing those bearings. Where the lines intersect is your approximate location.
Estimating Distance: Pace Counting & ‘Thumbing’
Pace Counting: Determine how many paces it takes you to walk 100 meters (your ‘pace count’). Use this to estimate distances on the map. Remember terrain affects your pace.
‘Thumbing’: Keep your thumb lightly on the map at your current location. As you walk, move your thumb along the map, maintaining awareness of your position relative to the terrain.
Relocation Techniques: When You’re Not Sure Where You Are
If disoriented, don’t panic! Stay calm and try the following:
- Retrace your steps: If possible, return to the last known point.
- Identify prominent landmarks: Hills, rivers, or distinctive buildings.
- Resection: Take bearings to at least two known landmarks on the map.
Planning a Hike with Map and Compass
Before setting out, carefully plan your route using a map. Consider:
- Terrain: Choose a route appropriate for your fitness level.
- Distance: Estimate the total distance and allow sufficient time.
- Weather Forecast: Check the forecast and pack appropriate clothing and gear.
- Route Card: Leave a detailed route card with someone, including your planned route, estimated return time, and emergency contact information.
Resources and Further Learning (2026)
- Ordnance Survey Website: www.ordnancesurvey.co.uk
- National Navigation: Offers courses and workshops.
- Local Hiking Groups: Search online for hiking groups in your area.
- Books: ‘Collins Gem – Map Reading’
In 2026, OS continues to refine its digital offerings, but the core skills of map reading and compass navigation remain essential for safe and rewarding hiking experiences in the UK. Investing in a good quality compass, a waterproof map case (£15-£25), a suitable hiking backpack with a map compartment (£60-£100), and a headlamp with a red light mode (£20-£30) alongside an outdoor first aid kit (£25-£40) will prepare you for any adventure.
FAQ
Q: What if my compass needle seems stuck?
Check for local attraction – nearby metal objects. Move away from them and try again. If it’s still stuck, the compass may be faulty.
Q: How often should I check my bearing while hiking?
Ideally, every few minutes, especially in challenging terrain or poor visibility. Regular checks help you stay on course.
Q: Is GPS a reliable substitute for map and compass?
No. GPS relies on battery power and satellite signal, which can be unreliable. A map and compass are independent and always work.
Q: What do I do if I get completely lost and can’t identify any landmarks?
Stay calm. If possible, retrace your steps to the last known point. If not, stay put, conserve energy, and signal for help.
Q: How important is practicing indoors before heading out?
Very important. Practice taking bearings and following them in a familiar environment before attempting navigation in the field. This builds confidence and skill.